Home Ideas: Decorative Stair Risers

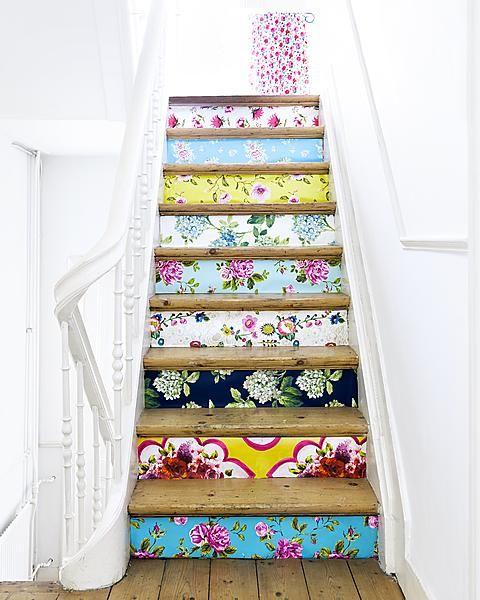
When decorating, areas outside of the main rooms are often overlooked; maybe because the majority of our time and most of our efforts have been used up on creating beautiful vintage living spaces, or perhaps because creating a retro look can often become quite pricey. Whatever the reason, there’s a trend which means that we can all create our dream staircases without the price tag!

Wallpapered stair risers are the answer to all our stair prayers. It’s a look that suits every home, no matter how modern of shabby chic you’ve chosen to decorate! Here is a brief step-by-step guide to creating that perfect look...
1. Choosing a wallpaper – will it be a subtle vintage designer print or a loud retro pattern?


2. Over time, stairs often become uneven, so measure the length and height of each stair panel separately to allow for any differences in size.
3. Prep the stair risers: clean each step with water and apply deglosser.
4. This step (step! Hilarious!) will depend on what type of wallpaper you've chosen. You’ll either need to add a thin layer of adhesive paste to each stair riser, or apply water to the back of the sheet if you’re using pre-pasted paper.
5. Press the wallpaper onto the chosen step. Start in the corner and work your way across, smoothing the paper with your fingers as you go and making sure the edges are firmly in place. Wipe with a wallpaper sponge.
6. Apply a clear acrylic or gloss on top of the wallpaper once it has set to protect it from wear and tear.
7. Step back and admire your beautiful re-vamped staircase!


Have you thought about going one step further and tiling your stairs? Take a look at ourUpcycling and DIY Pinterest board for more interior inspiration!


