The Best Storage Solutions for Your Shed


Do It Yourself: Storage Shed Plans
Maximising Space: Creative Storage Ideas for Sheds
Organisational Essentials: How to Optimise Shed Storage
Clever Shelving Solutions: Making the Most of Vertical Space

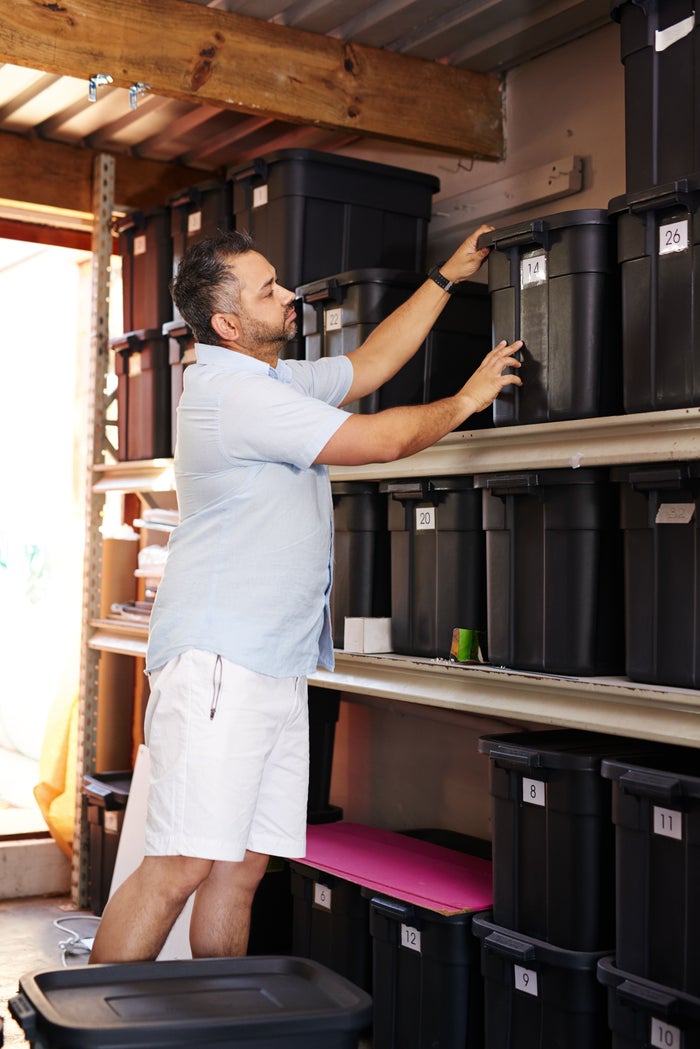
Toolbox Tactics: Organising Tools Efficiently in Your Shed
Whether you're a seasoned DIY enthusiast or just a casual tinkerer, having an organised toolbox is essential for any shed or workshop. With the right tactics, you can maximise space, minimise clutter, and ensure that you can easily find the tools you need when you need them. Here are some strategies for organising tools efficiently in your shed:
Assess Your Tool Collection: Start by taking stock of your tools and assessing which ones you use most frequently. Separate them into categories such as hand tools, power tools, garden tools, etc. This will help you determine how much storage space you need and how to allocate it effectively. Invest in a Quality Toolbox or Tool Chest: A sturdy toolbox or tool chest is the foundation of any well-organised tool collection. Choose one with multiple compartments, drawers, and trays to keep your tools organised and easily accessible. Look for features like removable dividers, foam inserts, and transparent lids to customise the layout to suit your needs. Utilise Drawer Organisers: Within your toolbox or tool chest, use drawer organisers to keep smaller tools and accessories neatly separated. Consider using foam inserts or custom-cut tool organisers to create designated spots for each tool, making it easy to see if anything is missing at a glance. Label Everything: Labelling is key to maintaining organisation in your toolbox. Use labels or color-coding to identify each tool and its designated spot. This not only makes it easier to find what you need but also helps ensure that tools are returned to their proper place after use. Group Similar Tools Together: Arrange your tools in the toolbox according to function or type. For example, keep all wrenches together, all screwdrivers together, and so on. This makes it quicker to locate the tool you need and reduces the risk of misplacing items. Utilise Wall Storage: In addition to your toolbox, make use of wall storage solutions such as pegboards, hooks, and magnetic strips to keep frequently used tools within easy reach. Hang larger tools like hammers, saws, and drills on hooks, and use magnetic strips for smaller metal tools like screwdrivers and pliers. Keep Safety Gear Handy: Don't forget to allocate space for safety gear such as goggles, gloves, and ear protection. Store these items in a designated area of your shed or toolbox where they're easily accessible whenever you're working on a project. Regular Maintenance: Finally, make a habit of regularly cleaning and organising your toolbox to keep it in top condition. Take the time to inspect your tools, remove any rust or debris, and replace any damaged or worn-out items as needed.
By following these toolbox tactics, you can transform your shed into a well-organised workspace where you can tackle any project with ease and efficiency.

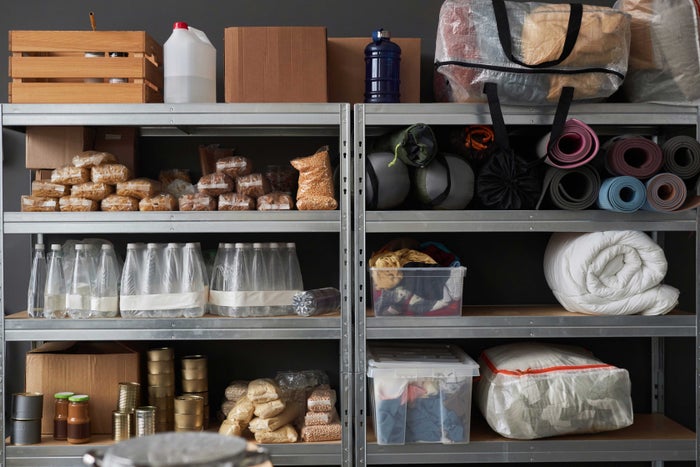
Seasonal Storage Solutions: Tips for Storing Seasonal Items in Sheds
Rotate Seasonal Items: As seasons change, rotate items in and out of the shed accordingly. Store items for the current season in easily accessible areas while keeping off-season items towards the back or higher shelves. Utilise Vertical Space: Maximise vertical storage by installing shelves, racks, or hanging organisers on the walls. This frees up valuable floor space and keeps items organised and visible. Invest in Clear Bins: Use clear plastic bins or containers to store seasonal items. This allows you to see what's inside without having to open each container, making it easier to find what you need. Label Everything: Label bins, shelves, and containers with the contents and the season they belong to. This makes it easy to identify and locate items when you need them, especially if you have multiple bins of similar items. Protect from Moisture: Prevent moisture damage by using waterproof bins or adding moisture-absorbing products like silica gel packets or moisture-absorbing crystals to the storage area. Consider adding ventilation to the shed to improve air circulation and reduce humidity. Store Seasonal Clothing Properly: If storing seasonal clothing, wash and thoroughly dry them before storing to prevent mould and mildew. Use garment bags or vacuum-sealed storage bags to protect clothing from dust, pests, and moisture. Hang Bulky Items: Hang bulky seasonal items such as bikes, sleds, or folding chairs on wall-mounted hooks or racks to free up floor space. Ensure they are securely fastened to prevent accidents. Protect Outdoor Furniture: Clean and cover outdoor furniture with weatherproof covers before storing them in the shed. This protects them from dust, dirt, and weather damage during the off-season. Create Zones: Divide the shed into zones for different seasons or categories of items (e.g. summer, winter, gardening, holiday decorations). This helps keep similar items together and makes it easier to locate them when needed. Regular Maintenance: Regularly inspect seasonal items for damage, pests, or signs of mould or mildew. Repair or replace damaged items as needed, and periodically declutter and re-organise the shed to maintain an efficient storage system.
By following these tips, you can effectively store seasonal items in your shed, maximising space, protecting belongings, and keeping everything organised and accessible throughout the year.

How to Insulate a Storage Shed
Evaluate the Shed: Assess the current condition of the shed, including its construction materials, existing insulation (if any), and any potential sources of drafts or moisture. Choose Insulation Material: Select an insulation material suitable for your shed and climate. Common options include fiberglass batts, foam board insulation, spray foam insulation, and reflective foil insulation. Consider factors such as R-value (thermal resistance), moisture resistance, and ease of installation. Prepare the Shed: Clear out the shed and clean the interior walls and ceiling surfaces. Repair any cracks, gaps, or holes in the walls, roof, or floor to prevent air leaks and moisture infiltration. Install Vapour Barrier: Install a vapour barrier, such as plastic sheeting, on the interior walls and ceiling to prevent moisture from seeping into the insulation. Overlap seams and seal edges with tape to create an airtight barrier. Install Insulation: Cut insulation panels or batts to fit snugly between the wall studs, ceiling joists, and floor joists. Ensure the insulation completely fills the cavity without compressing it, as this reduces its effectiveness. Use adhesive or staples to secure the insulation in place. Seal Gaps and Cracks: Seal any remaining gaps, cracks, or openings with expanding foam sealant, caulk, or weatherstripping to prevent air leakage and drafts. Pay particular attention to areas around doors, windows, vents, and electrical outlets. Add Insulating Materials: For added insulation and moisture protection, consider adding rigid foam insulation boards or reflective foil insulation to the interior walls, ceiling, and floor. These materials can be installed over the existing insulation or as an additional layer. Ventilation: Install vents or louvers to provide adequate ventilation and prevent condensation buildup inside the insulated shed. Position vents near the roof peak to allow warm air to escape and draw in fresh air from outside. Finish Interior: Once the insulation is installed, you can finish the interior walls and ceiling with drywall, plywood, panelling, or another suitable material. This provides a finished look and further enhances the insulation's effectiveness. Maintain Insulation: Regularly inspect the insulation for signs of damage, moisture buildup, or pest infestation. Repair any damaged insulation promptly, and ensure proper ventilation to prevent moisture-related issues.
By following these steps, you can effectively insulate your storage shed, creating a more comfortable and protected environment for stored items year-round.
Take the first step towards transforming your outdoor haven today with Bark.com. Sign up for a free quote and let us connect you with top-tier gardening services tailored to your needs. They’re dedicated to making gardening a breeze, so you can focus on the important stuff – like creating cherished memories with your loved ones, all while leaving the hard work to them.