Restoration Project: Stu’s VW Camper Van Part 2
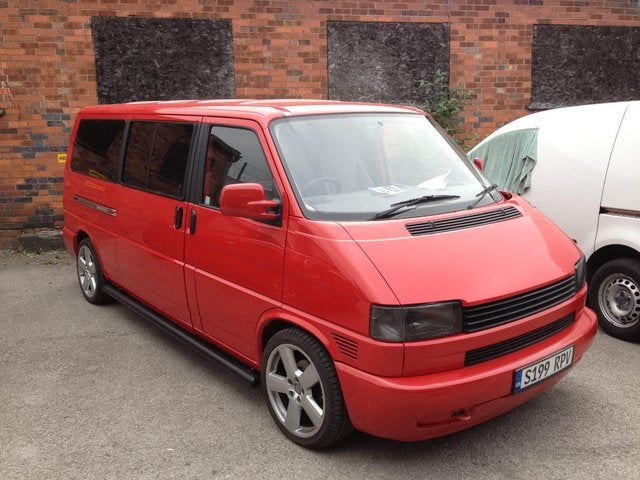
Today we hand the Preloved blog over to Stu Howarth once again. This time, we discover the next steps to take this former Builder's Van to Dream Camper Van. If you haven't already, you can read part one of Stu's VW Camper Van Restoration by clicking here.
VW Camper Van Restoration Part 2: The Build Begins
Camper Van Insulation
Now I had decided on the look and feel for the van, I began to start planning what I needed to do. I knew I would be sleeping in the van through all kinds of weather conditions, so after researching on Camper Van Restoration forums I decided to insulate the panels of the van; I used insulation made from recycled plastic. To help reduce noise, I also lined the internal metal; this also made the van more soundproof from the rolling road. Then, I carpeted the metal and ply lining with black carpet.
Window Refurbishment
The previous owner had painted the inside of the back rear window black, presumably to give the windows a tinted look from the outside. I thought from the outside this actually looked really good, but I knew I wanted it to be a tinted (not painted) window. We spent some time peeling the paint away; once the window was cleared I decided to install another window on the other side, so that the van was symmetrical.
This was a job I knew I couldn't do myself. After doing some research, I took the van to a local VW specialist called AutoKraft who cut out and installed my new window and also tinted them in a limousine tint. There, I spotted a material called 'fly eye', which is a tint that can be applied to headlights, maintaining safety and the ability to pass an MOT. I simply couldn't resist and had my headlights made to look black! I also decided to wrap my black side bars with a black alligator skin effect to give it a bit of a punch. As soon as I did this I knew the van needed to follow a colour scheme of black, white and red. I LOVED it!

Renovating The Camper Van Interior
The interior of VW T4's include a grey dashboard and door cards. This didn't fit in with my newly decided colour scheme. So I opted to spray paint them in black using a special paint designed to dye leather, vinyl and plastics. This took a while to do and it actually took longer to mask everything than it did to actually paint!
Once this was completed I looked at my front seats, which were also grey. Do I dye them black or not? Oh what to do! I opted to scrap them entirely and buy some Mini Cooper S seats that were half leather. These were much more comfortable than the BMW seats I had in originally and really helped finish the front cab off.
I could now concentrate back on the rear of the van. Again, the previous owner had installed a dated vinyl floor that had a wood effect. This had to go. I needed a black and white chequered floor, there was no question about it. I simply visited a local carpet shop and bought an roll end.

Fitting Out The Back Of The Van
When revamping the back of a camper van, some people decide to have full width seats in the back, and others opt to have 3/4 width seats that allow for kitchen units to be added. I had read that you can fit IKEA kitchen units into the back of a T4, so this is what I did. I bought a set of wall carcasses that would allow me to have a tall cupboard at the back and opted to go for high gloss red doors. This would really fit in with my van's style. I only had to modify one unit so that it would fit at the top of the van and fit the curvature of the roof. All the others fitted in perfectly next to my rock and roll bed without any modifications required.
It was at this stage I actually decided to not install a cooker and fridge. A lot of people do this, but I didn't think it was very flexible and to be honest, I never really fancied cooking in my van anyway. Instead I thought I would buy a decent mobile camping cooker and a 12v fridge. This would give me the flexibility to have more surface space on top of the units and more cupboard space too.
Finishing Touches
So what's next for my VW Camper Van Restoration? I knew I would have to install my electrics, add my in car entertainment and also install my lights. I also had to decide on my seat upholstery in the back as well as decide on the surface of the kitchen. This was going to the fun part where I add the final polish....
Inspired by Stu's story?
If you're looking for a VW Camper for sale or
Did Stu manage to achieve his Camper Van dream?
We’d love to hear your restoration stories! Get in touch with us at editorial@preloved.co.uk, or tweet us
!Stuart Howarth by day runs his own digital marketing agency called Koko Digital that produces mobile and web based games for many household brands. In his spare time he is an avid photographer, artist and loves travelling. He writes about many of his travel experiences on his blog Where's My Passport. This follows his trips around the world including his road trips in his VW camper van called Roxy. He is also a big fan of LEGO and likes to play the Guitar!


