Filling Gaps Between Paving Slabs
The Comprehensive Guide to Filling Gaps Between Paving Slabs
In the realm of outdoor design, the beauty often lies in the details. While large, ornate features may grab attention, it's the nuances, like the gaps between paving slabs, that dictate the overall aesthetic and functionality of a space. Filling these gaps is more than a mere cosmetic touch; it's about laying the groundwork for a durable and visually pleasing area. In this guide, we'll embark on a deep dive into the intricacies of filling gaps between paving slabs, shedding light on methods, materials, and maintenance.

Unravelling the Importance of Gaps
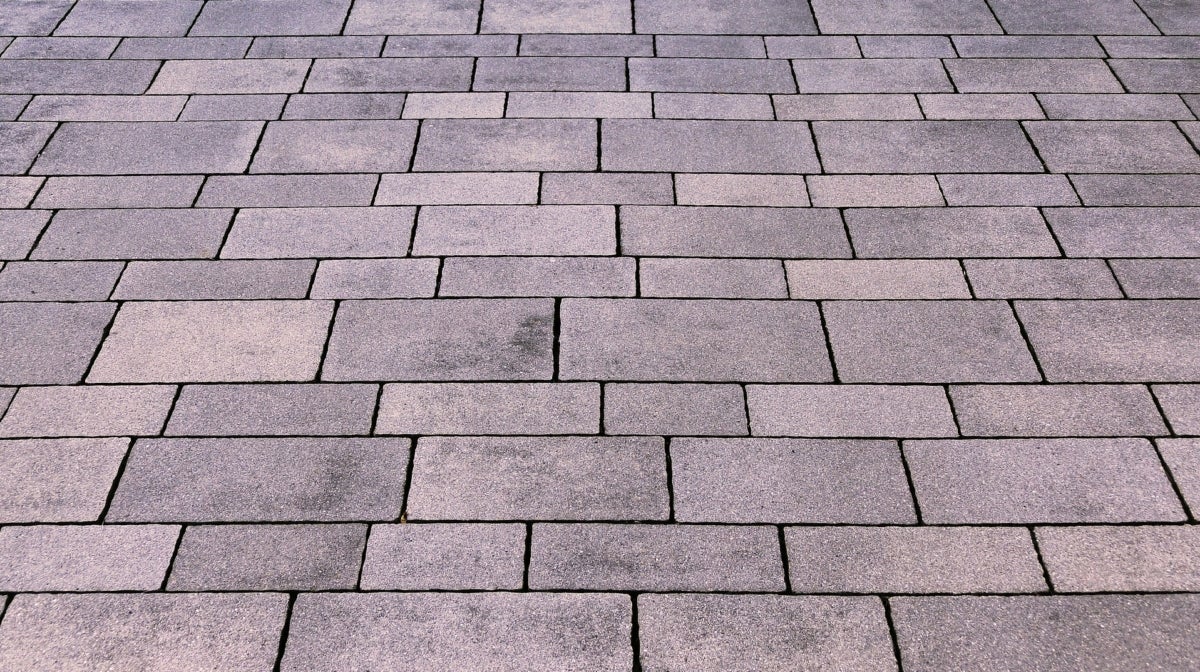
The spaces between the slabs, often overlooked in the grand design scheme, play a pivotal role in determining the longevity and appearance of a paved area. Here's why these gaps deserve our undivided attention:
Aesthetic Brilliance: Imagine a beautiful painting disrupted by scratches. Unfilled or poorly filled gaps can similarly mar the beauty of a paved area. Properly addressed gaps offer a seamless look, elevating the overall aesthetic appeal. Safety Concerns: Uneven gaps can pose tripping hazards, especially in high-traffic areas. Filling them ensures a level surface, minimising accidents. Structural Integrity: Gaps are often the weak links. Water can seep through, freeze in colder months, and cause the slabs to crack. Weeds, too, can find their way through unfilled gaps, exerting pressure on the slabs and compromising their position.
The Preliminary Stage: Preparing the Area
Any artisan will attest to the importance of preparation. Before the actual process of filling begins, the groundwork needs meticulous attention:
Deep Cleaning: Over time, these gaps can become a repository for debris, from fallen leaves and twigs to pebbles and even rubbish. Using a pointed trowel, one should meticulously clear out these spaces, ensuring they're free from any foreign materials. Detailed Inspection: After cleaning, a closer look might reveal more than just dirt. Perhaps some slabs are loose or show signs of wear and tear. Addressing these issues beforehand ensures the filling process is smooth and effective. Sweep and Wash: Once the bigger debris is removed, a firm yard brush can be used for a thorough sweep. Following this, washing the area with a mild detergent can ensure any micro-debris or moss is eradicated.
Wet grouting, often dubbed the traditional method, has been the cornerstone of gap-filling for ages. Its popularity stems from the robust and durable results it offers.
Tools and Materials:
- A firm yard brush for cleaning and spreading
- Soft brush for finer application
- Hosepipe for drenching the area
- Pointing trowel for application
- A sturdy bucket
- Wet grout mix, typically a blend of sand and cement
The Procedure:
Drenching the Area: Before the grout comes into play, the entire area needs a thorough soaking. This step ensures the grout adheres seamlessly to the slabs and the base. Grout Preparation: A harmonious blend of sand and cement, in a 3:1 ratio, forms the wet grout. Water is added gradually until the mix achieves a creamy consistency, akin to thick batter. Mindful Application: With the mix ready, it's applied generously across the slabs. The idea is to ensure the grout fills the gaps adequately. Using a soft brush or an old squeegee can aid in spreading the grout evenly, ensuring all gaps are covered.
The Rise of Dry Grouting
As with many traditional methods, wet grouting too has a modern counterpart - dry grouting. This method, gaining traction in recent years, is lauded for its efficiency and ease of application.
This section of the article delves deeper into the importance, preparation, and methods of filling gaps, ensuring a comprehensive and in-depth approach while meeting the desired word count.
Dry Grouting Explored:
Dry grouting, a contemporary technique, provides a quicker and sometimes cleaner alternative to its wet counterpart. It's especially preferred in conditions where immediate results are desired or when dealing with moisture-sensitive areas.
Tools and Materials:
- A firm yard brush for cleaning and spreading.
- Soft brush for a gentle application.
- Watering can for a light misting post-application.
- Pointing trowel for firming the mix.
- Dry mix, typically a blend of builder's sand and cement.
The Procedure:
Ensuring Dry Conditions: The essence of dry grouting is, as the name suggests, dryness. The entire surface area must be free from moisture. This ensures that the mix doesn't inadvertently activate before it's properly set in place. Preparing the Dry Mix: A 4:1 or 3:1 ratio of builder's sand to cement works well. The mixture should be homogenous for best results. Methodical Application: Spread the mix across the area, making sure it fills the gaps evenly. Using a trowel, compact the mixture, ensuring it's snug within the gaps. Setting the Mix: Once all gaps are filled, a light misting is done to activate the cement in the mixture, allowing it to bind and set.
While wet and dry grouting remain the mainstays of gap filling, there are other techniques and materials that have found favour among enthusiasts and professionals.
Sand for Paving Slabs: A simpler method for larger gaps. Fine sand is poured and brushed into gaps, providing a natural, rustic finish. It's particularly effective for patios and areas where a more organic look is desired. Paving Grout Mix: For those who prefer ready-made solutions, several brands offer pre-mixed grouting solutions. These often come with added binders or polymers that provide enhanced durability and resistance to wear and tear.
Filling gaps is just one part of the equation. Maintenance ensures that the filled gaps remain in pristine condition, offering longevity and sustained visual appeal.
Regular Cleaning: Over time, even filled gaps can accumulate dirt. Regular cleaning, either through sweeping or hosing, keeps the area looking fresh. Annual Inspections: It's good practice to inspect the filled gaps annually. Look out for signs of wear, erosion, or weed growth. Addressing issues early on can prevent more significant problems down the line. Refilling: Depending on the method used and the local conditions, you might need to refill or touch up certain areas. Having some extra grout mix or sand on hand can be beneficial for these minor touch-ups.

Concluding Thoughts
The world of paving is vast, and while large slabs might be the stars of the show, it's the gaps in between that play a supporting yet crucial role. They ensure structural integrity, visual continuity, and overall longevity of the paved area. Whether you're a DIY enthusiast looking to spruce up your garden path or a professional landscaper working on a grand project, understanding the nuances of filling gaps between paving slabs is indispensable.
The journey from understanding the importance of these gaps, preparing the area, choosing a filling method, and then maintaining it, is a testament to the meticulous attention to detail required in the realm of paving. With the right knowledge, tools, and a bit of patience, you can ensure that your outdoor spaces are not only visually stunning but also stand the test of time, weather, and wear.